in SSIS 2008, we are going to use “LOOKUP Transformation” task between our source and destination. LOOKUP will do the job of checking source and destination. It can return match/not match data as per your need.
Follow bellow steps:
1. Open BIDS and create new project for Integration Services and drop “Data Flow Task” in your work area from toolbox. To configure it, double click on that so that you will be redirected to the “Data Flow” tab.
Now, on dataflow tab, please drag “ADO NET Source” task from toolbox and drop it to your work area.
Double click on it to configure and set your database and table of ADV1 database there, for more information look at below screen shot.

2. Drag “LOOKUP” transformation task to your work area and join LOOKUP task with ADO NET SOURCE. Now, double click on “LOOKUP” to configure it.
Since, we want to copy only those rows which doesn’t exists in destination table, we have to select “Redirect rows to no match output” option from LOOKUP Transformation Editor and click on “Connection” tab at left hand side.

3. Select your destination database and table. For more information, please look at the below given screen shot.

Now, please understand this concept, “ADO NET Source” returns row from ADV1.ChemicalConsume table which will be “Input” for our “LOOKUP” task. In the connection tab of LOOKUP task, we have made connection to “ADV2.ChemicalConsume” table as a destination so that LOOKUP will compare source and destination.
4. Now from “LOOKUP Transformation Editor” click on “Column” tab to set on which columns we are going to make comparison. Our comparison will be on “ChemID” and “ConsumeDate” fields of both the tables. So let us do it.

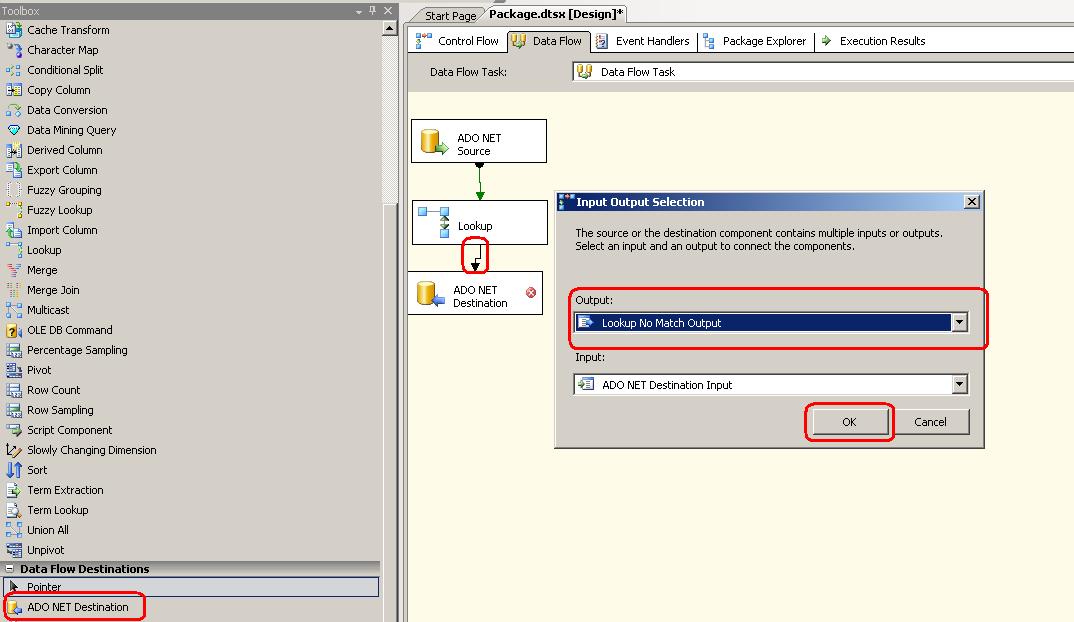
5. Now, take “ASP NET Destination” from tool box and join it with green arrow of “LOOKUP” task.
As soon as you will try to join green arrow of “LOOKUP” with “ASP NET Destination” you will get on small dialog box named “INPUT OUTPUT SELECTION”. Set the drop down value as shown in below screen.
6. Now finally double click on “ADO NET Destination” to configure it and set your ADV2 database along with appropriate table.

7. Now, run your package by hitting F5 and see output of the package.
No comments:
Post a Comment